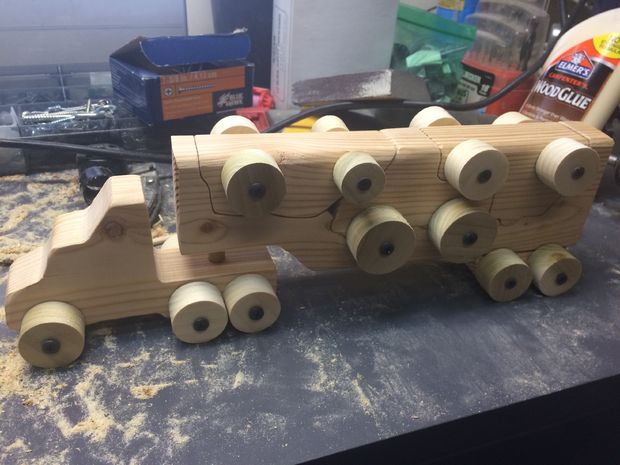

Here’s my first instructable. I wanted to build something easy for my kids for Christmas and found a couple of interesting ideas on different websites. The blue background photo is kind of what I wanted to replicate but I wanted to kind of make it my own so here is what I ended up with.
Step 1: What You’ll Need
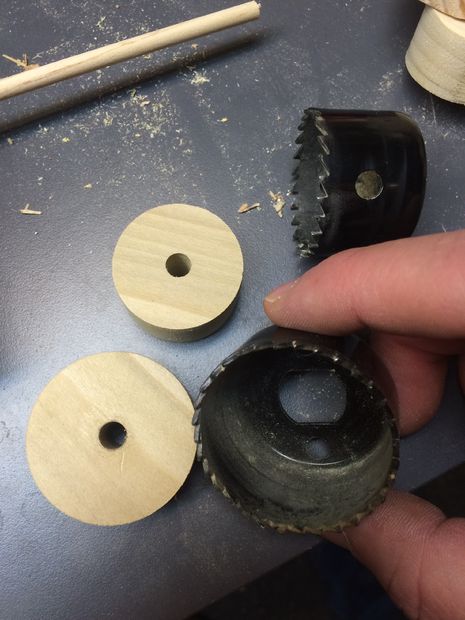
I didn’t want to spend a whole lot of money on this so I used mostly things that I had laying around namely some 2 x 4’s and some screws and a piece of scrap 3/4″ for the wheels. Tools used were scroll saw a belt sander and drill with large hole bits. Later I found that the cars may slide off the trailer so I added little dowels to hold them in place and to use to connect the front of the semi truck to the trailer.

Toy_Truck_Hauler.pdf206 KB
Step 2: Measure And Cut


*** Update – I added a PDF you can print out and trace ***
The main trailer is 11 1/4 inches long but you could make it any length you want depending on what kind of cars you want to cut out of it. The diesel was 6 inches long. The wheels on the truck I made a little bit bigger. They are one and 3/4 inches.The semi truck wheels are all one and a half inch. The other cars were one and a half inch and then the front wheels on the racer I made smaller. I think those were 1 inch.
Step 3: Sand And Assemble


So once you got your designs cut out you want to sand all the edges make them nice and smooth and then install your wheels. I found that a little dremel sander was helpful in some of the tight areas. This is when I discovered that the cars on the back and the front will slide off so I wanted to secure them with dowels.The ones I used for 3/16 but you could use whatever size you have handy. Then you drill corresponding holes in the tops of the vehicles so that they fit nicely together. To mark the top of the car I put just a little bit of wood glue on the top of the dowel and then just put the car on top to find where it would need to be drilled. Cutting these out was the longest part as my scroll saw didn’t like to cut through 2 x4’s very quickly. Also it’s probably best to pre-drill your wheel holes so that you don’t have any splits.
Step 4: Hooking The Semi To The Trailer

So I used a larger dowel for the semi hitch and the larger hole for the trailer. just make this a little bit long so you can make sure that the trailer rides flat. I just sanded it down to adjust the height till I got it where I wanted it to be. The rear of the trailer I elevated with a little piece of wood and then attached the wheels to that.
Step 5: Finished … Well Almost


So at this point you should have something looks like the top picture. I’m not sure if I’m going to paint mine or stain it yet. Also you could use wood burner to add detail or you could drill holes for windows like the first one. I guess I’ll see what my kids want after I give it to them and then will make some final adjustments. enjoy!